iPhone 6 Rear Camera Replacement
STEP 1
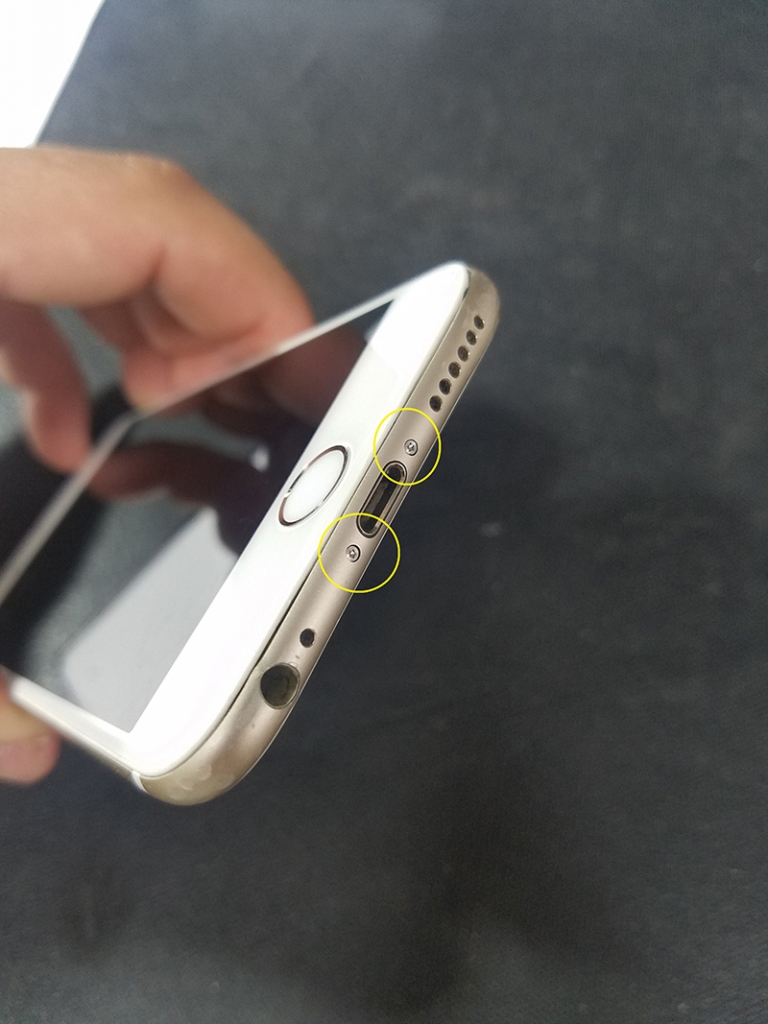
Remove 2 Pentalobe screws located on the bottom of the iPhone.
STEP 2
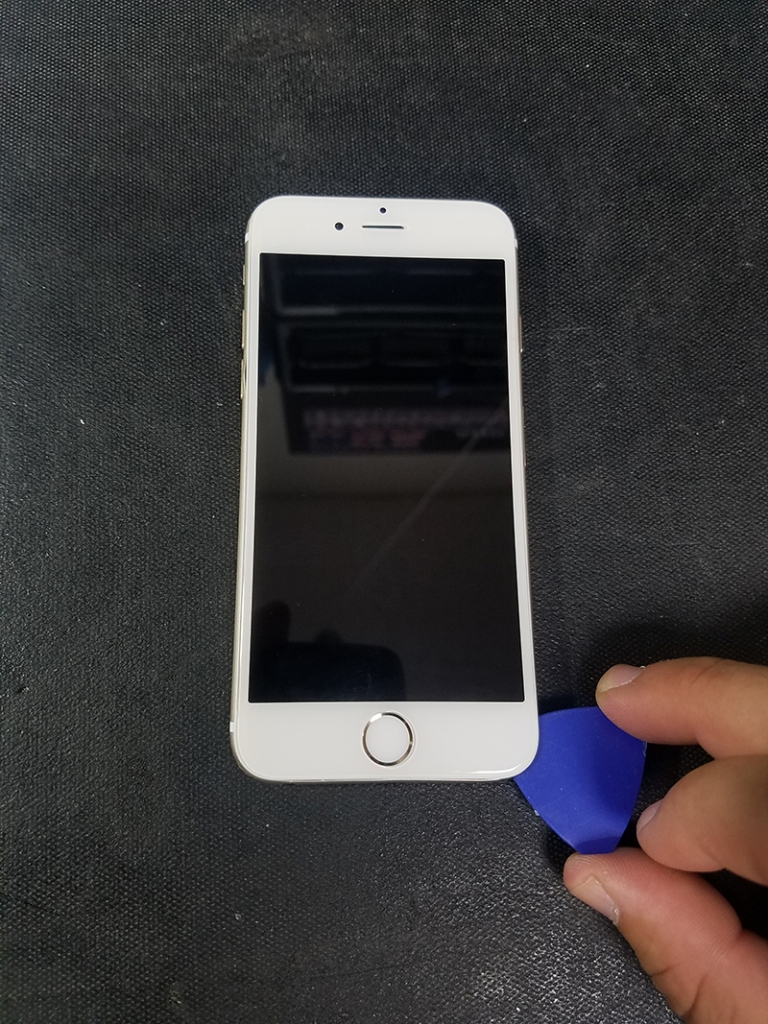
Using a suction cup or plastic pick, carefully lift the screen from the bottom, up in a clam-like motion.
STEP 3
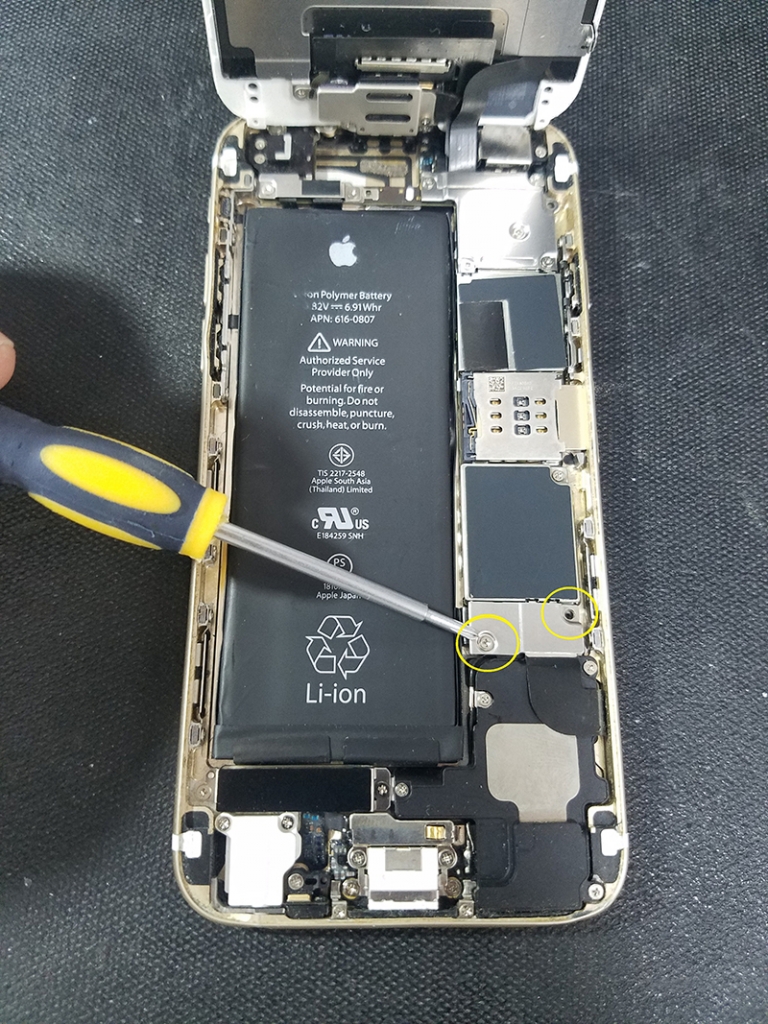
Locate battery cover plate and remove 2 Phillips screws. Remove plate.
STEP 4
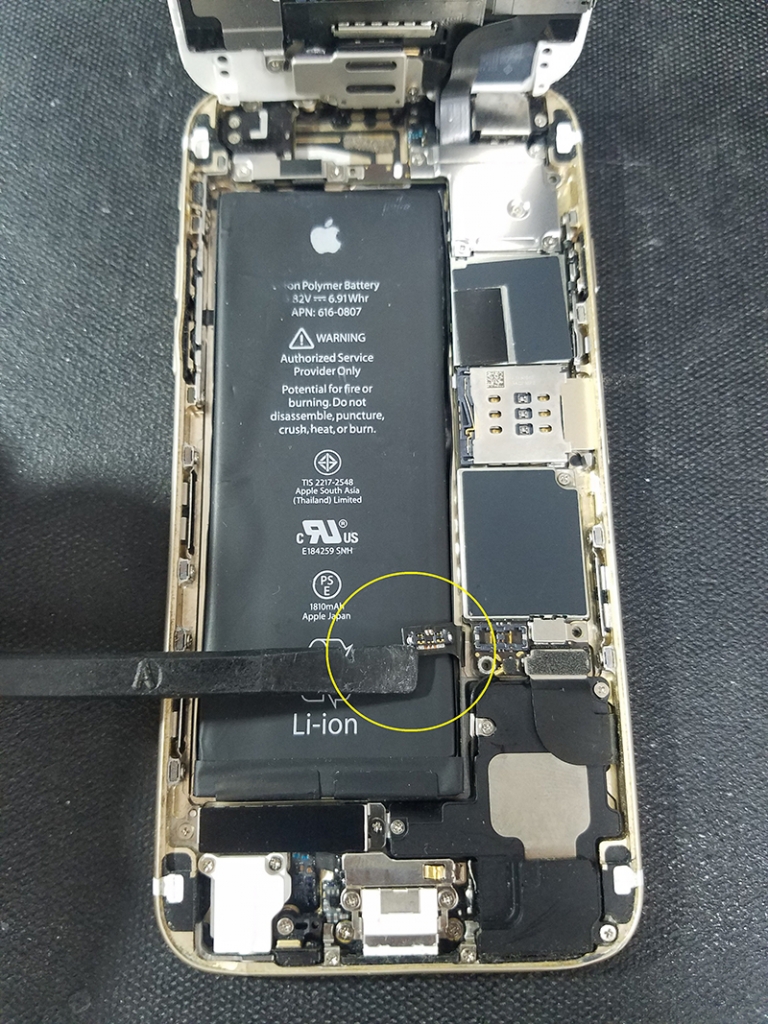
Using a plastic pick carefully disconnect battery and fold over to avoid contact during repair.
STEP 5
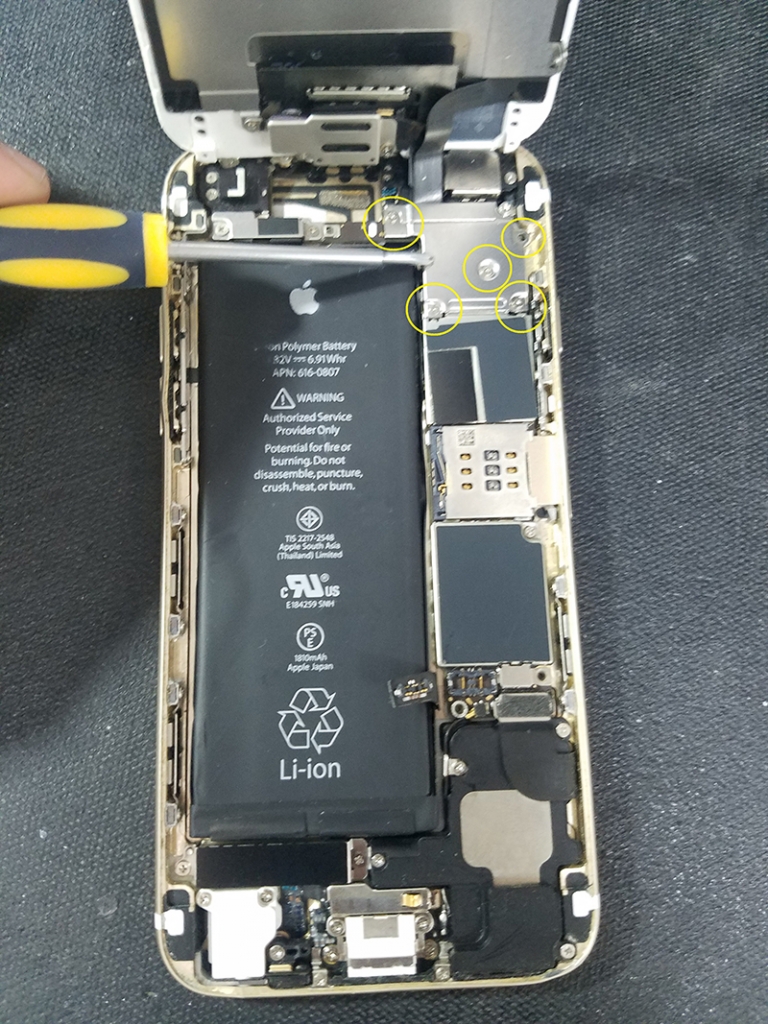
Locate screen cover plate and remove 5 Phillips screws. Remove plate.
STEP 6
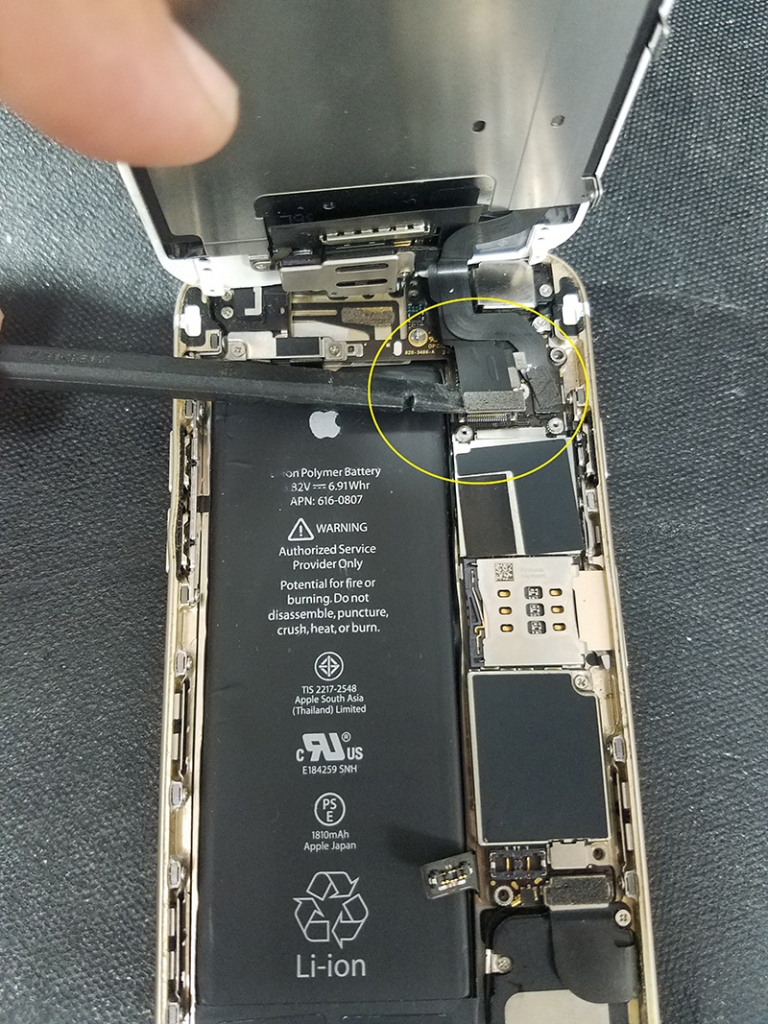
Using a plastic pick, carefully disconnect 4 flex cables. Set the rest of the iPhone aside and place the screen face down on a protected surface.
STEP 7
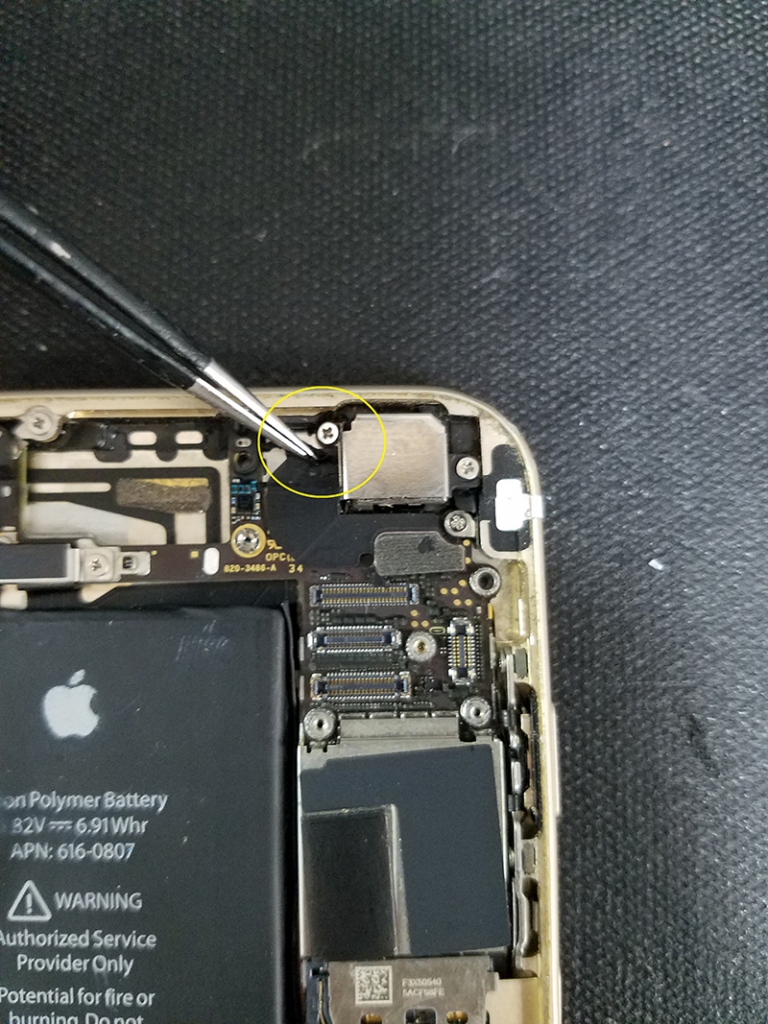
Remove any tape covering a Phillips screw on the top left of the rear camera.
STEP 8
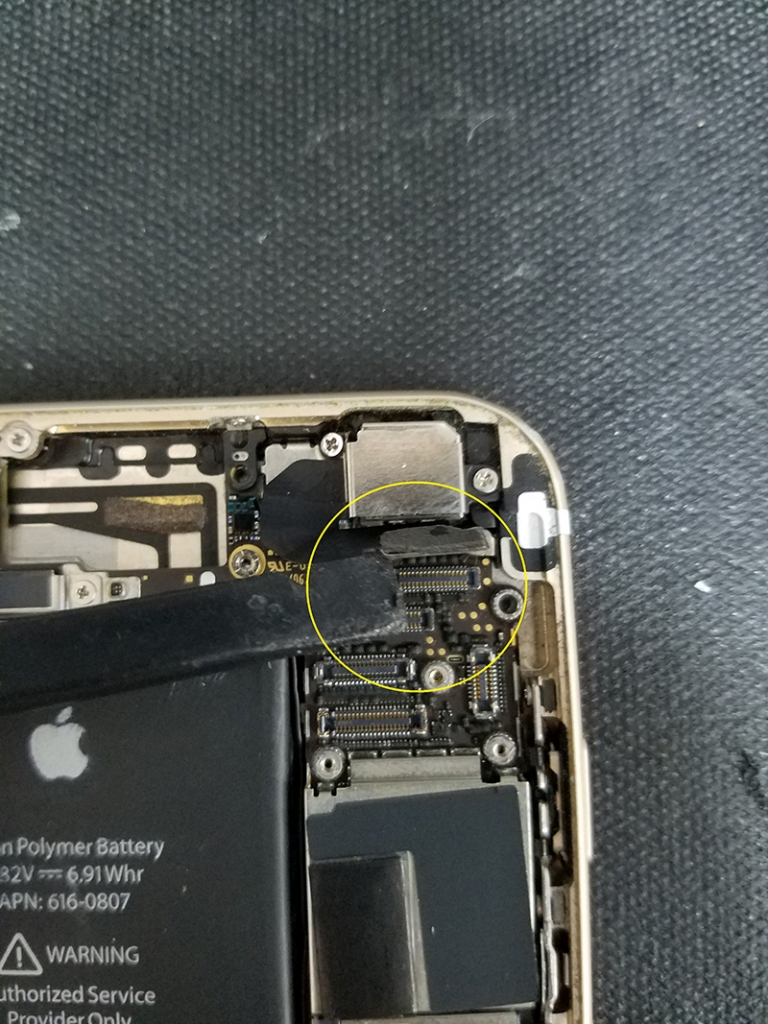
Using a plastic pick, carefully disconnect the rear camera flex.
STEP 9
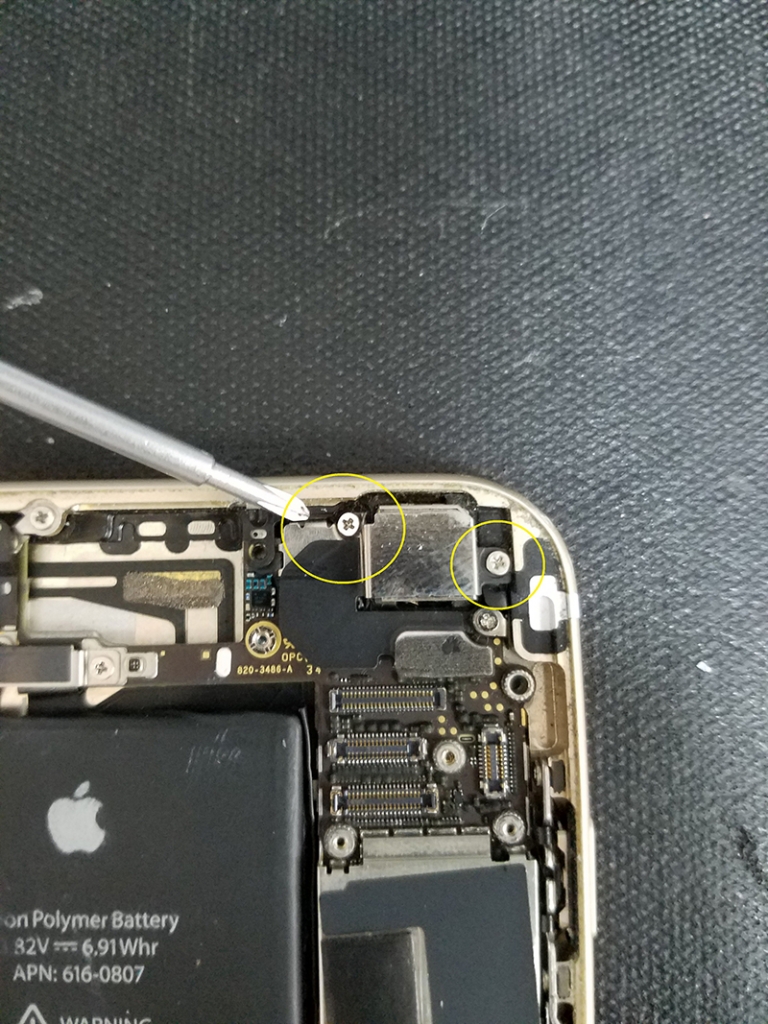
Remove 2 Phillips screws to the top left and center right of the rear camera.
STEP 10
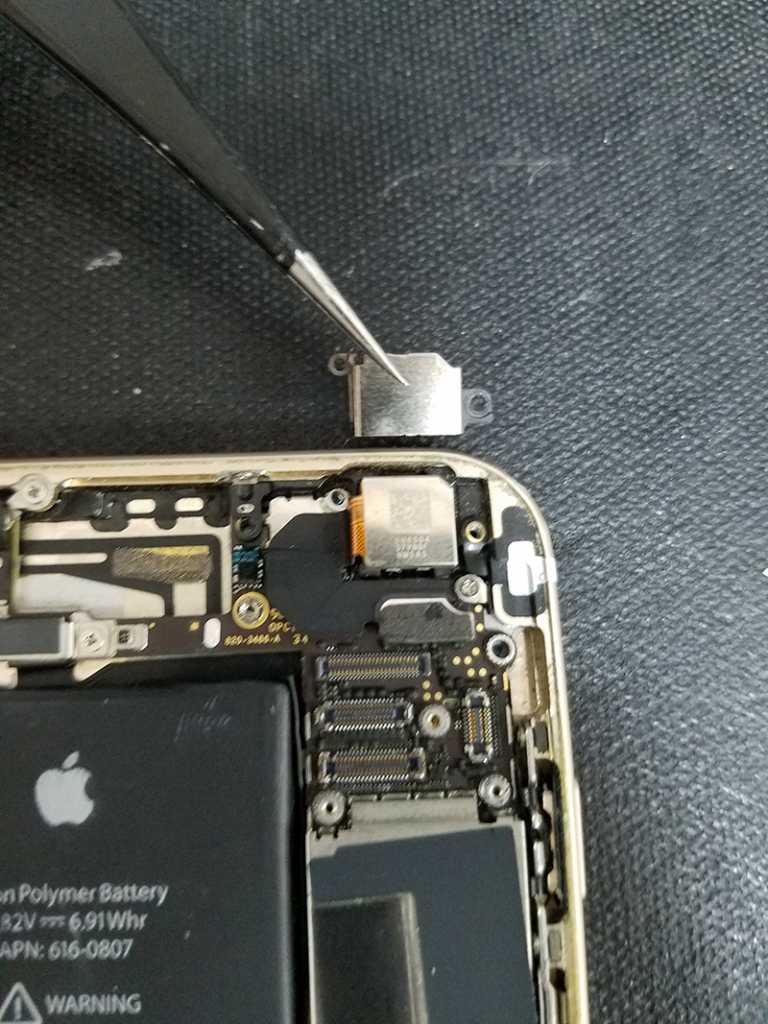
Remove the rear camera bracket.
STEP 11
Carefully lift the rear camera module up and remove.
STEP 12
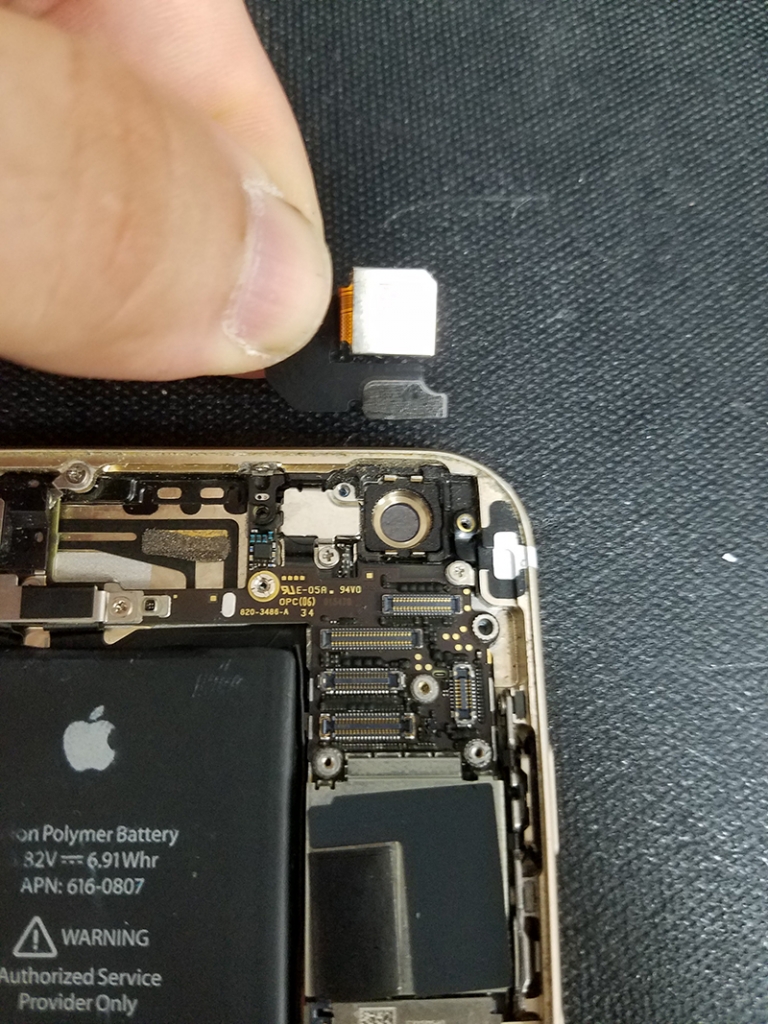
Clean the inner lens with a Q tip and prep for new camera.
STEP 13
Insert new camera into place and make sure it sits flush and secure.
STEP 14
Replace the rear camera bracket and secure with 2 Phillips screws.
STEP 15
Reapply protective tape over top left screw.
STEP 16
Carefully reconnect rear camera flex.
STEP 17
Carefully reconnect screen with 4 flex cables.
STEP 18
Replace screen cover plate and secure with 5 Phillips screws.
STEP 19
Reconnect battery and replace battery cover plate. Secure with 2 Phillips screws.
STEP 20
Close phone and make sure it is secure in place.
STEP 21
Secure 2 Pentalobe screws on bottom of iPhone
STEP 22
Power on iPhone and test device.
