iPhone 6 Screen Replacement
STEP 1
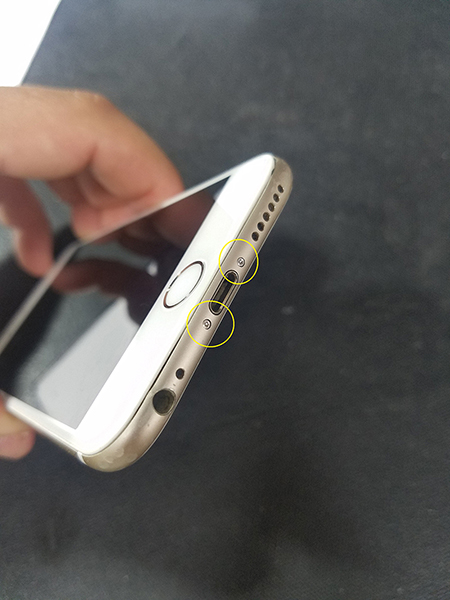
Locate and remove 2 Pentalobe screws on the bottom of the iPhone.
STEP 2
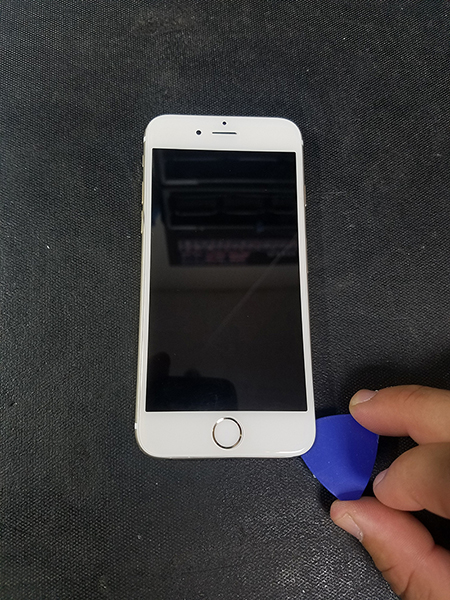
Using a suction cup or plastic pick, lift the bottom of the screen up and open in a clam like motion. Be very careful not to over extend the screen as this could cause the flex cables to rip or break.
STEP 3

Locate the battery cover plate and remove 2 Phillips screws. Then remove the plate.
STEP 4
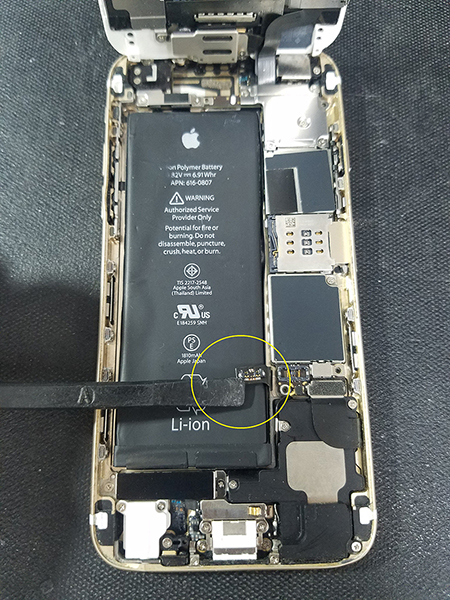
Using a plastic pick, carefully disconnect the battery flex and fold over to avoid contact during repair.
STEP 5
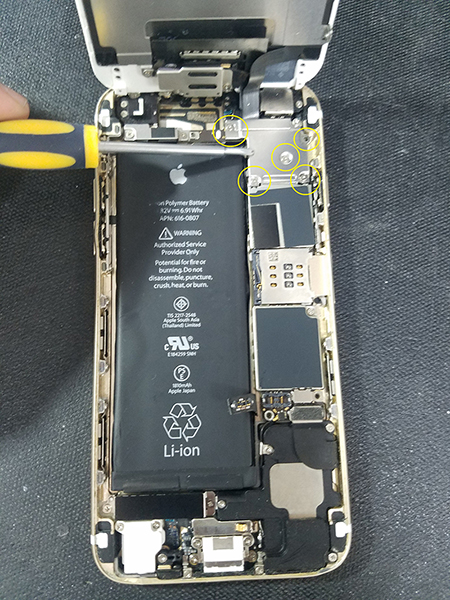
Locate the screen flex cover plate and remove 5 Phillips screws. Then remove the plate.
STEP 6
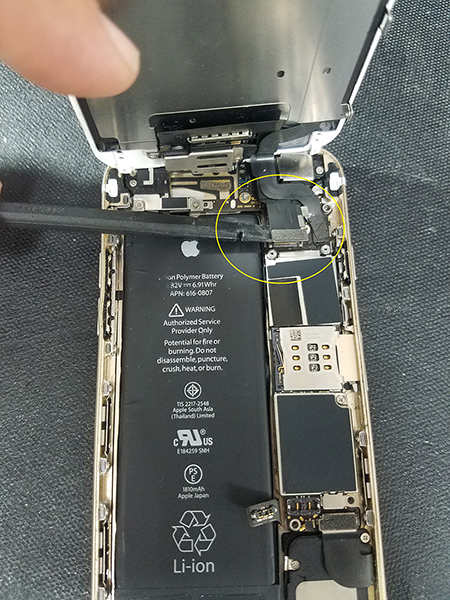
Using a plastic pick, carefully disconnect 4 flex cables. Set the rest of the iPhone aside and place the screen face down on a protected surface.
STEP 7
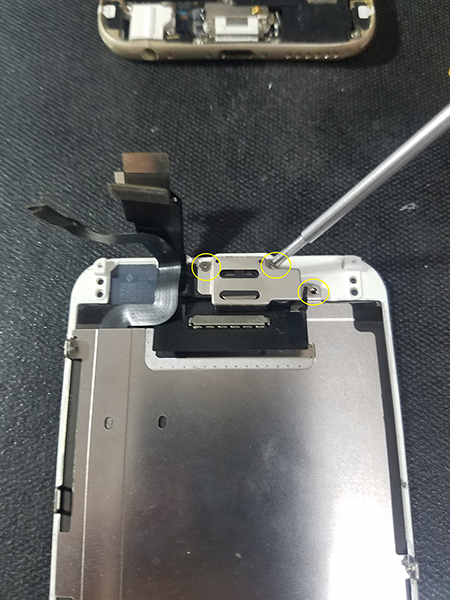
Locate the earpiece bracket and remove 3 Phillips screws. Then remove the bracket.
STEP 8
Very gently, lift the front camera up and out of the plastic bracket. Then fold over to the left.
STEP 9
Remove the earpiece.
STEP 10
Apply heat to the front of the glass to lossen the adhesive holding the proxy sensor and mic in place.
STEP 11
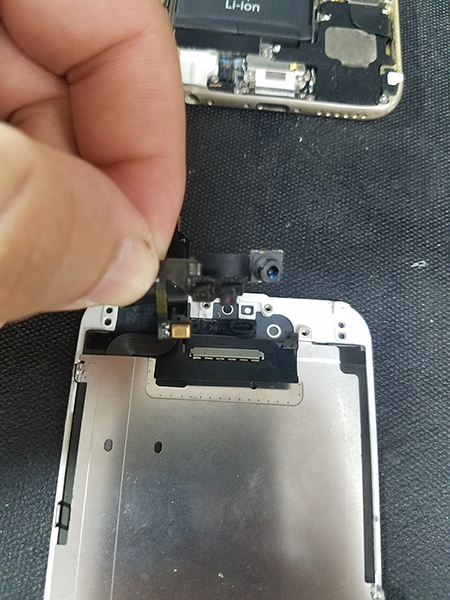
Very carefully lift the top of the flex up until the proxy sensor is removed from the bracket.
STEP 12
Apply more heat if needed and remove the last part of the flex that is adhered to the left of the earspeaker opening.
STEP 13
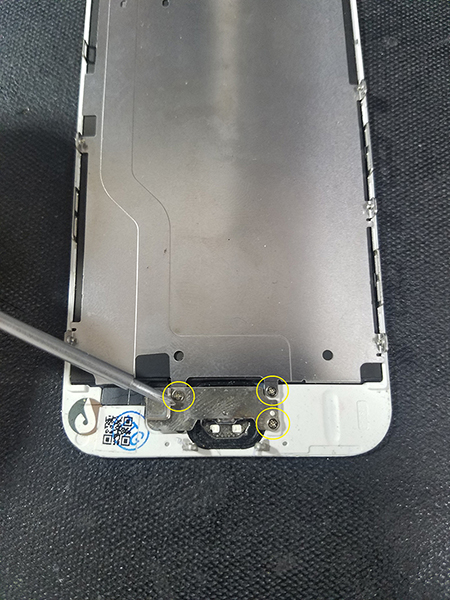
Locate the home button plate on the bottom of the screen and remove 2 Phillips screws. Remove the plate.
STEP 14
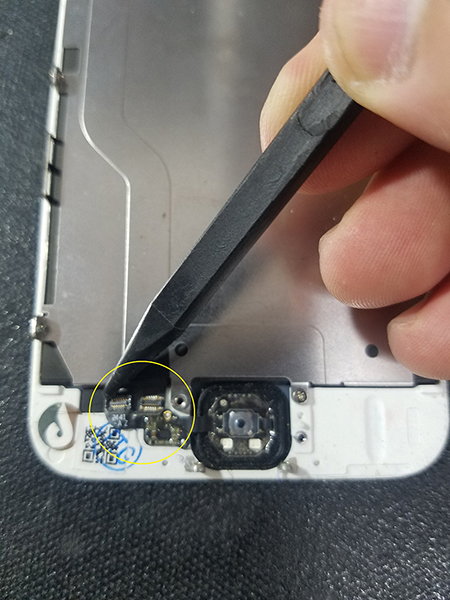
Carefully disconnect the flex cable.
STEP 15
Apply heat to the front of the glass to lossen the adhesive holding the home button and flex cable in place.
STEP 16
Carefully remove the flex and home button.
STEP 17
Apply more heat if needed and lift the flex connector that was connected to the home flex so it no longer adheres to the screen.
STEP 18.a
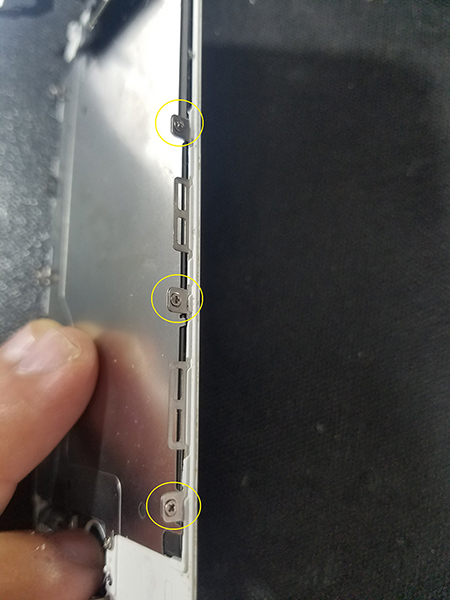
Locate the LCD plate and remove 6 Phillips screws, 3 on each side of the screen and 1 Phillip screw on the bottom next to the home button. Remove the plate.
STEP 18.b
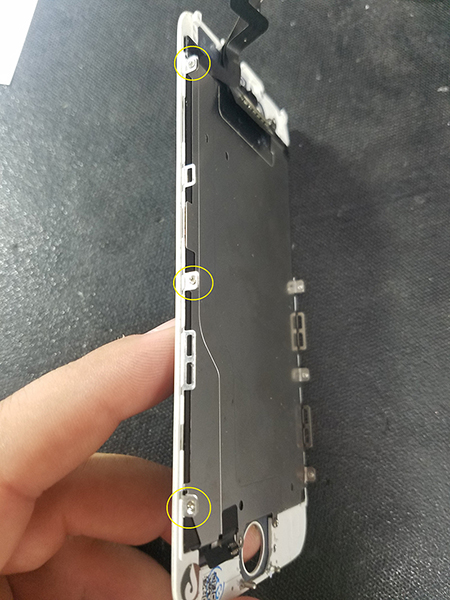
Locate the LCD plate and remove 6 Phillips screws, 3 on each side of the screen and 1 Phillip screw on the bottom next to the home button. Remove the plate.
STEP 19
Properly label the old screen with a ü, üX, or X depending on its condition, and set aside.
STEP 20
Before working on the new screen, visually inspect it for scratches, dings, or any physical damage. If screen is in new condition, proceed to next step, otherwise note the defect(s) and ask for another screen.
STEP 21
Before reassembling the new screen, carefully connect the LCD and digitizer flex cables to the iPhone, reconnect the battery and power on the device.
STEP 22
Test the screen thoroughly for touch sensitivity, color, and backlighting. If no defect is found, proceed to next step, otherwise note the defect(s) and ask for a new screen.
STEP 23
Using a plastic pick, carefully disconnect the battery and fold over to avoid contact during the repair.
STEP 24
Carefully disconnect the flex cables and place the screen face down on a protected surface.
STEP 25
To reassemble the screen, follow Steps 7- 18 in reverse carefully. Note that all pieces should fit snug and should NOT have to be forced into place. If you encounter a problem, recheck your work and the proper step(s) to assemble.
STEP 26
After you have sucessfully assembled the screen, reconnect the 4 flex cables and reapply the plate over the connectors with 5 Phillips screws.
STEP 27
Reconnect the battery and reapply the battery plate with 2 Phillips screws.
STEP 28
Close the screen onto the iPhone body in a clam like motion. The screen should fit snug into the housing and no gaps should be visible.
STEP 29
Reapply 2 Pentalobe screws to the bottom of the iPhone.
STEP 30
Power on the device and test and check all parts of the device.
