iPhone 6 Selfie Camera Replacement
STEP 1
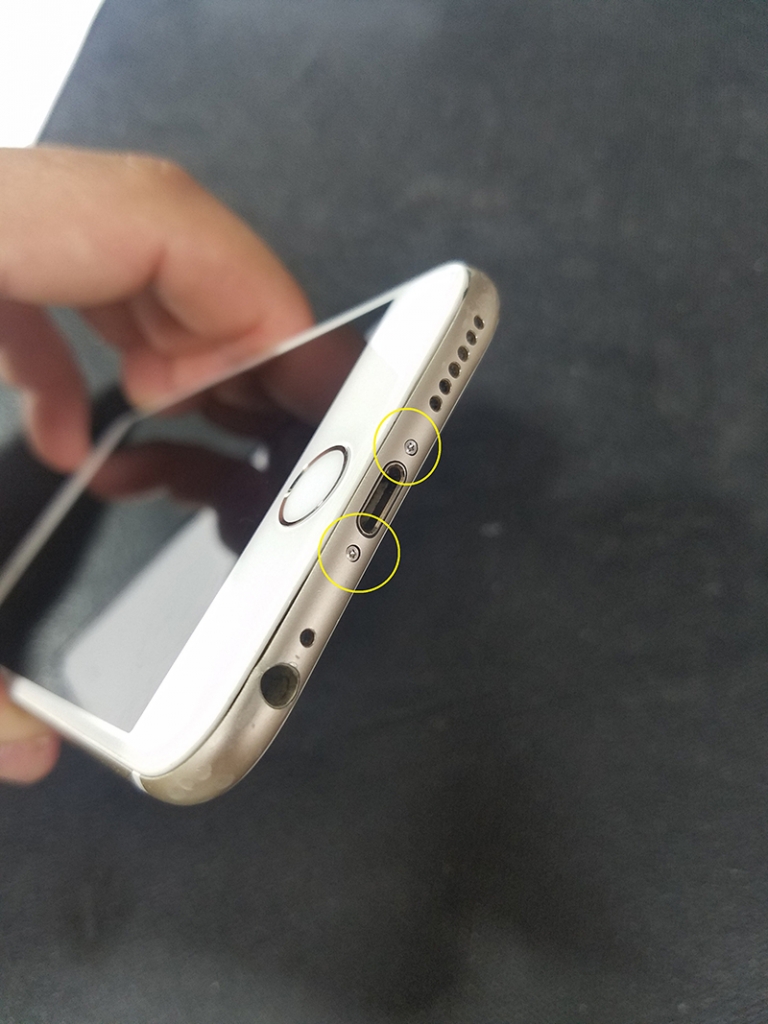
Remove 2 Penta lobe screws from bottom of iPhone.
STEP 2
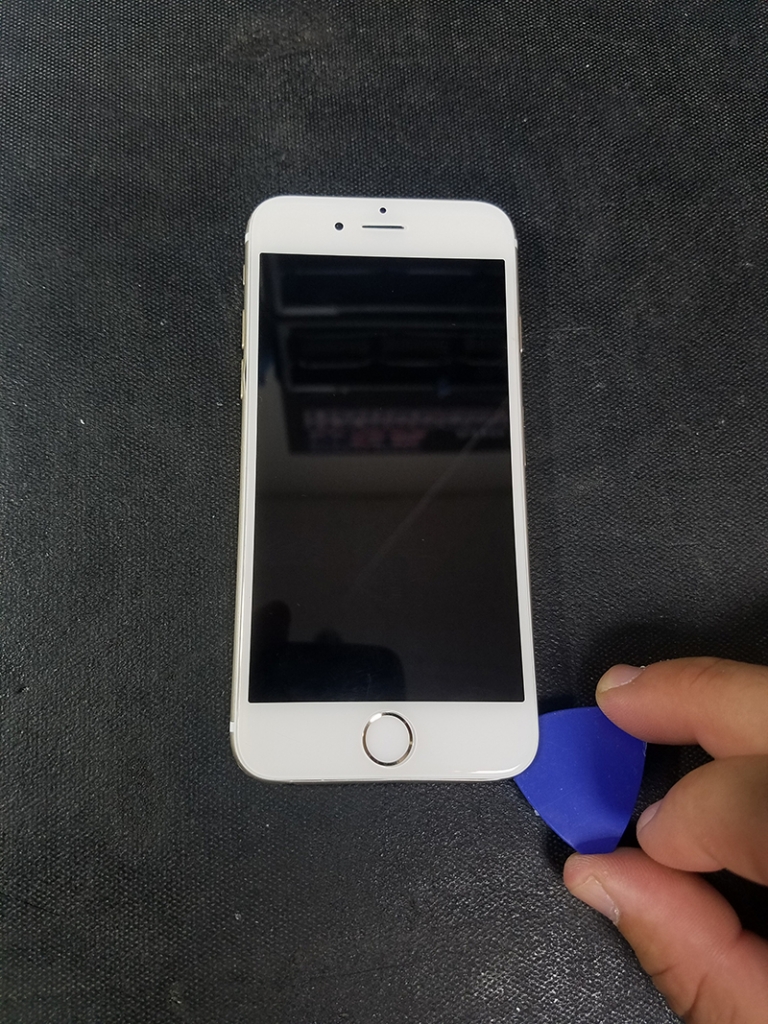
Use a suction cup or pick, gently lift the bottom of the screen up and open in a clam-like motion.
STEP 3
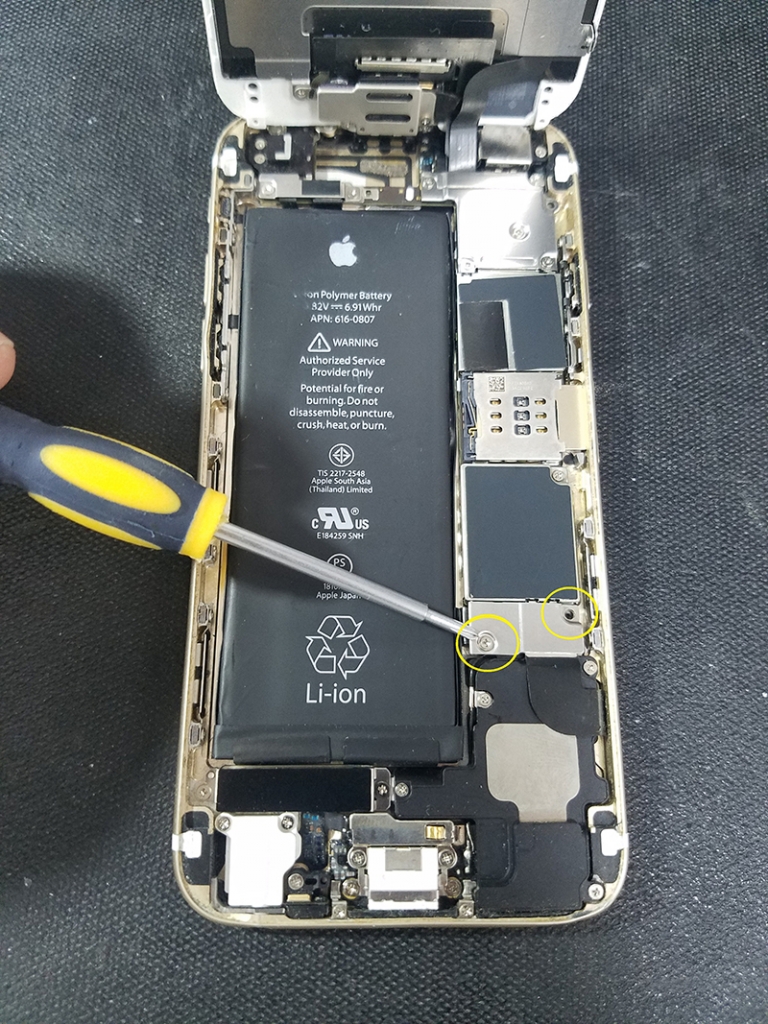
Remove 2 Philips screws from the battery and dock flex bracket cover and remove the bracket.
STEP 4
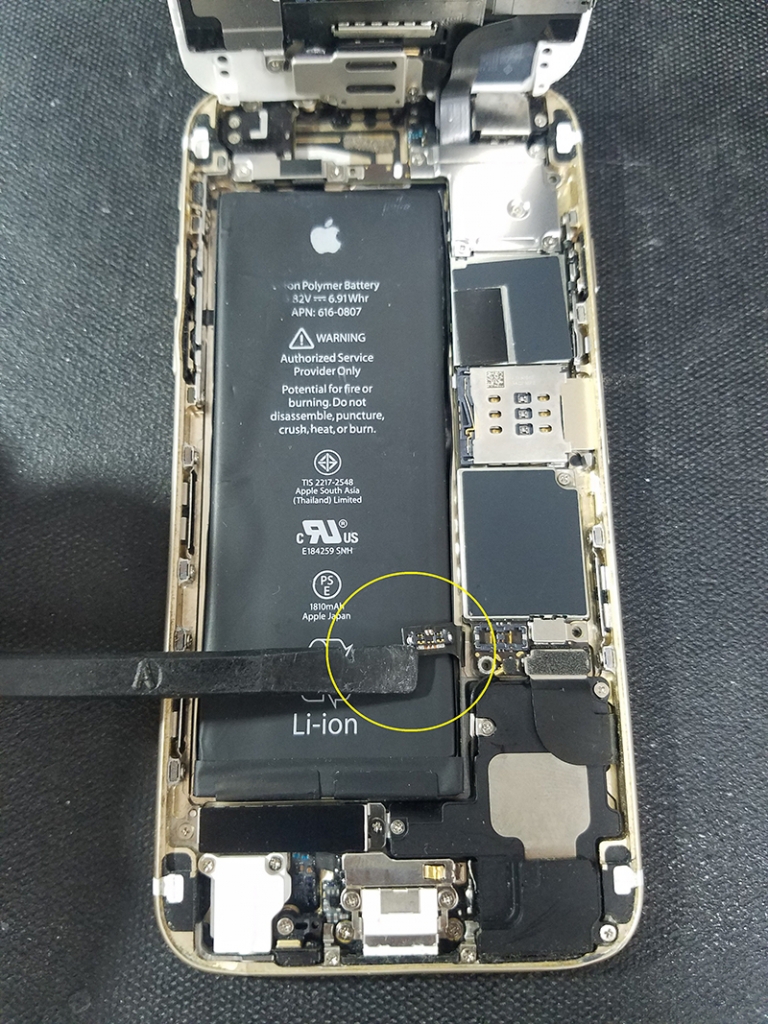
Using a plastic tool, carefully disconnect the battery.
STEP 5

Remove 5 Philips screws from the screen bracket cover and remove the bracket.
STEP 6
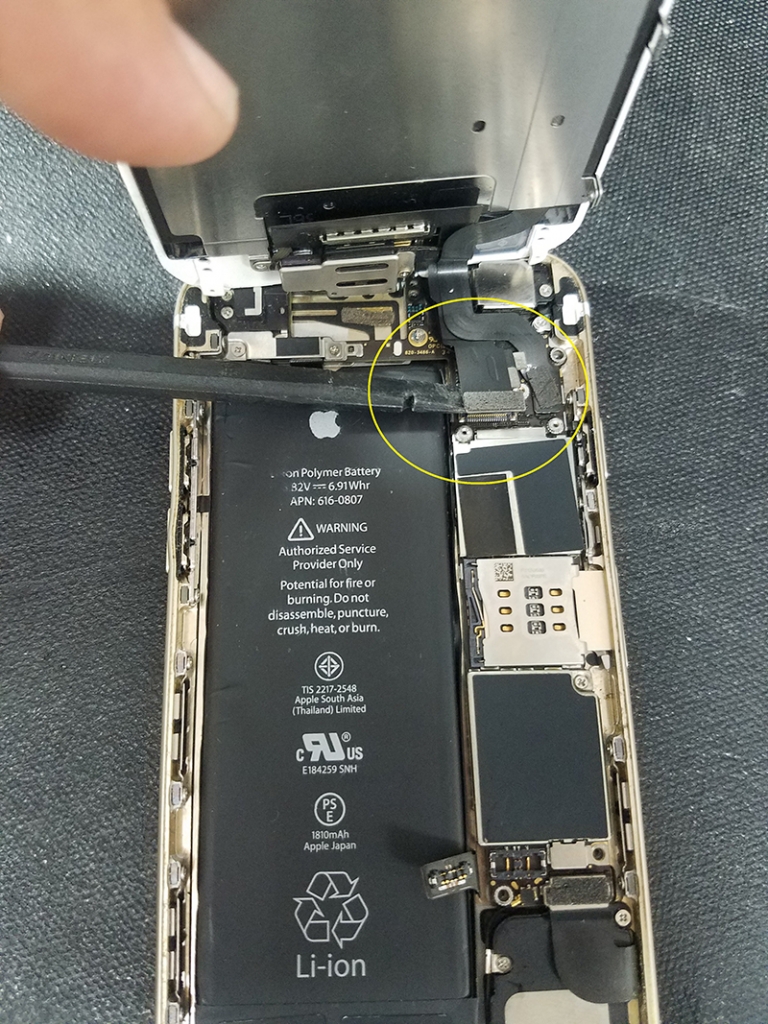
Using a plastic tool, carefully disconnect the 4 flex connectors and put the iPhone body aside.
STEP 7
Lay the screen glass side down on a soft, protected surface.
STEP 8

Remove 3 Philips screws from the earpiece bracket and remove the bracket.
STEP 9
Carefully lift the selfie camera up and over the earpiece.
STEP 10
Remove the earpiece.
STEP 11
Apply heat to the front glass to loosen the adhesive holding down the rest of the flex cable.
STEP 12
Using a plastic tool, gently lift the top of the flex cable until the proxy sensor lifts out of the bracket.
STEP 13
Carefully lift the last part of the flex cable next to the ear speaker.
STEP 14
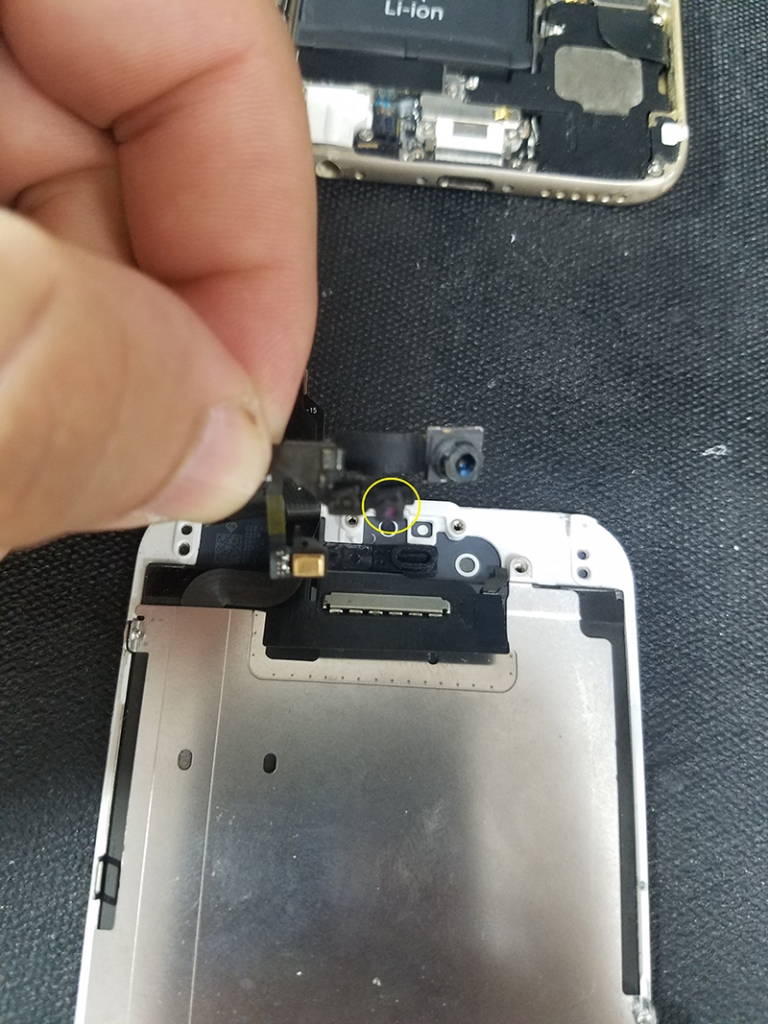
Remove the flex cable, and remove black rubber cover on the light sensor from old flex and apply to the light sensor on new flex.
STEP 15
Place mic of new flex to the left of ear speaker location. There will be a small pin to place the flex over.
STEP 16
Flip the flex over and seat the proxy sensor into the plastic bracket. The light sensor fits into opening next to the proxy sensor.
STEP 17
Place ear speaker into rubber gasket and align corners over screw locations.
STEP 18
Place camera flex over the speaker and into the plastic bracket. Make sure it sits flush in place.
STEP 19
Replace bracket over component and screw holes are properly aligned.
STEP 20
Replace 3 Phillip screws onto bracket, do not over tighten.
STEP 21
Connect 4 flex cables onto the motherboard. Make sure they are securely in place.
STEP 22
Reconnect battery and power on the device. Test all components (Sirimic, proxy sensor, light sensor, ear speaker, and selfie camera) If something is not working properly, go back and check your work.
STEP 23
If all components are functioning properly, Replace LCD flex bracket with 5 Phillips screws.
STEP 24
Replace battery cover bracket with 2 Phillips screws.
STEP 25
Carefully close iPhone screen onto the body and make sure it is securely in place.
STEP 26
Replace 2 Penta lobe screws to the bottom of iPhone.
STEP 27
Test all components of iPhone.
